PMS Integration
Integration Installation Guide
Connecting your practice management system (PMS) to Smile Advantage is a one-time setup that takes about five minutes. The connection runs through Sikka, our integration partner that enables your PMS and your Smile Advantage dashboard to share patient records, appointment data, and payment information automatically.
What is Sikka, and why does it need to be me?
Section titled “What is Sikka, and why does it need to be me?”
Sikka is our integration partner for PMS connectivity. We chose Sikka because it is the healthcare industry’s leading integration platform, already trusted to securely connect more than 50,000 practices and over 183 million patients. Creating a Sikka account is what authorizes your practice management software and your Smile Advantage dashboard to exchange data - syncing patient records, appointment schedules, and payment information without any manual exports.
Before you begin
Section titled “Before you begin”Gather the following before you start:
- About 5 minutes
- Your practice name, address, and phone number
- Access to the email inbox you will register with (you will need to forward one email to us at the end)
- A mouse or trackpad to sign the agreement
Start here
Section titled “Start here”Open the registration page in your browser:
Open the Sikka registration page
All seven steps below start from this page.
Steps at a glance
Section titled “Steps at a glance”| Step | What you do |
|---|---|
| 1 | Click Register on the Smile Advantage listing |
| 2 | Review the order screen and click Next |
| 3 | Select No for “Are you a Sikka Customer?“ |
| 4 | Sign the Business Associate Agreement |
| 5 | Fill in your practice details |
| 6 | Confirm your subscription |
| 7 | Forward the “Welcome to Sikka” email to Smile Advantage support |
Step 1: Open the registration page
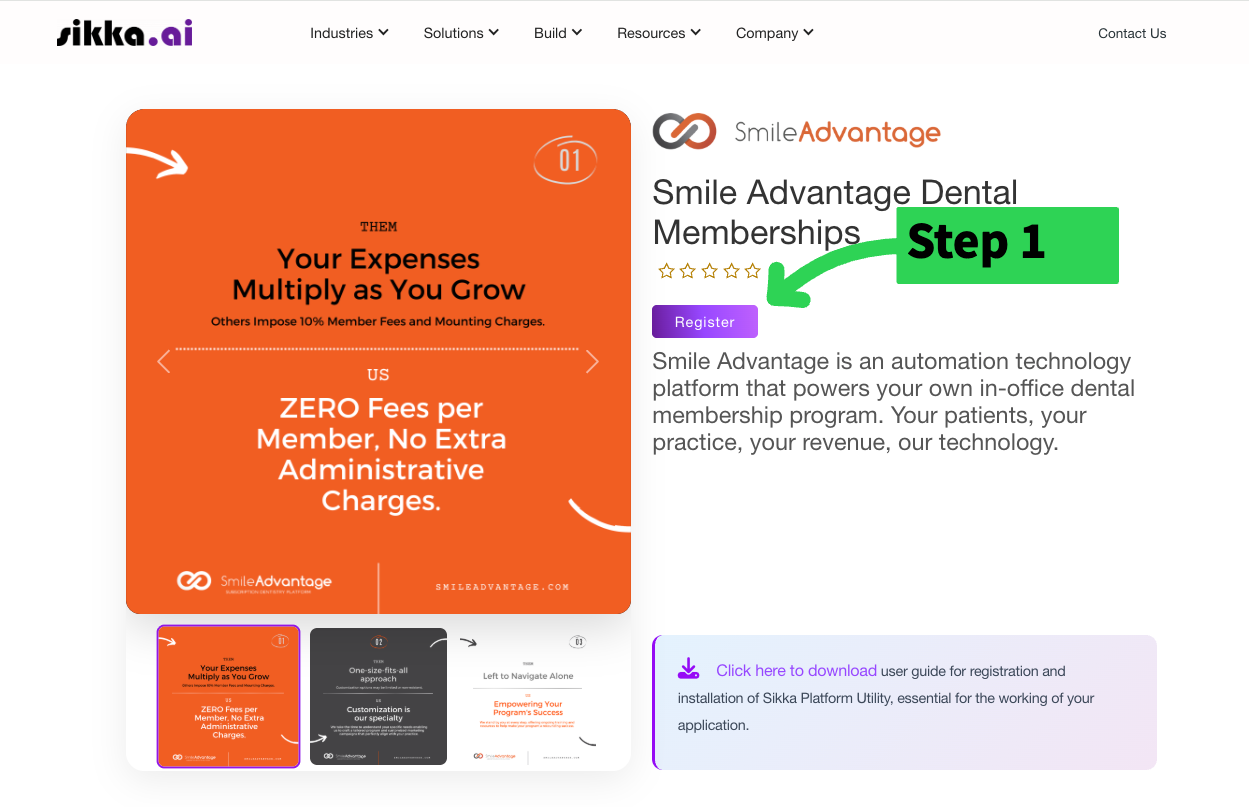
Section titled “Step 1: Open the registration page”Go to sikkasoft.com/SmileAdvantage in your browser. You will see the Smile Advantage Dental Memberships listing. Click the purple Register button to begin.
You can ignore the “download user guide” link - our team handles the technical installation on our end once you complete your steps.
Step 2: Review your order and continue
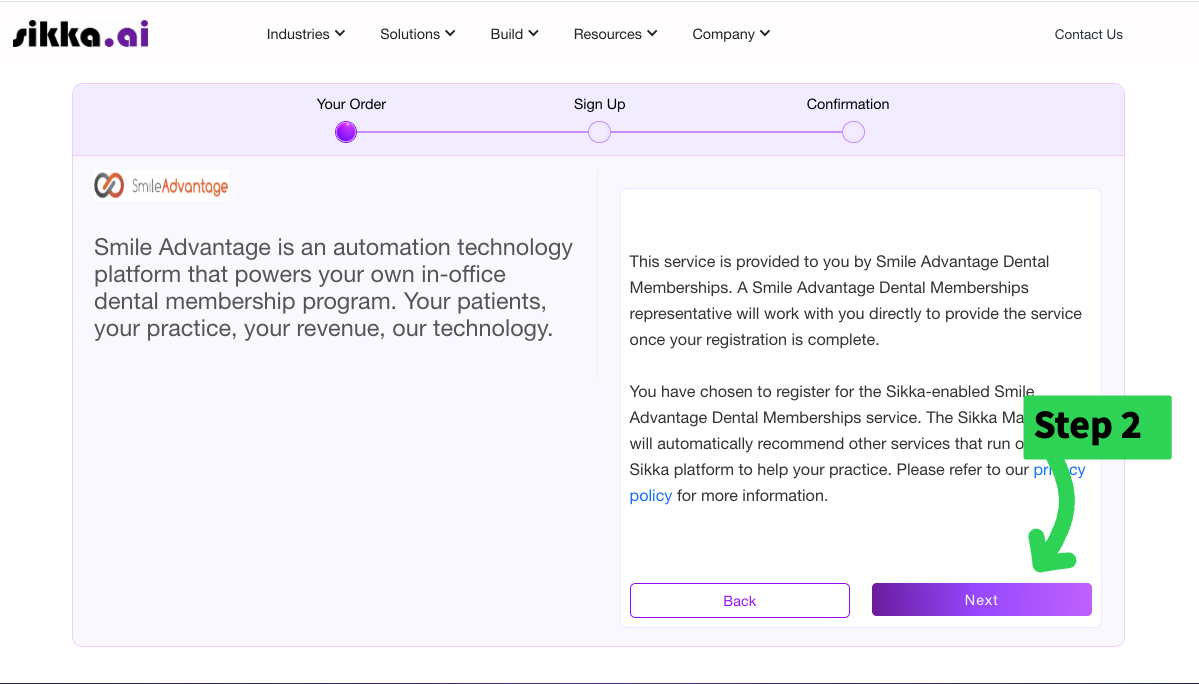
Section titled “Step 2: Review your order and continue”This screen confirms the service is Smile Advantage Dental Memberships. Read the short note, then click Next to continue.
Step 3: Answer the sign-up question
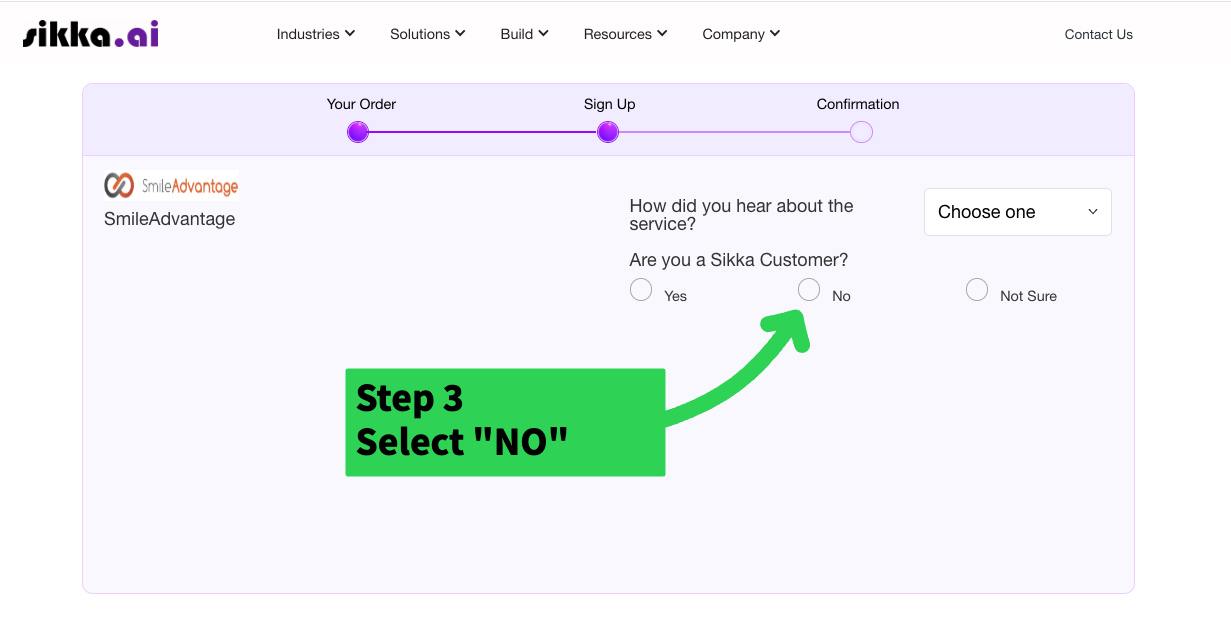
Section titled “Step 3: Answer the sign-up question”Open the “How did you hear about the service?” dropdown and choose the option that best fits.
Under “Are you a Sikka Customer?”, select No. This tells the system to create a brand-new account for your practice.
Step 4: Read and sign the agreement
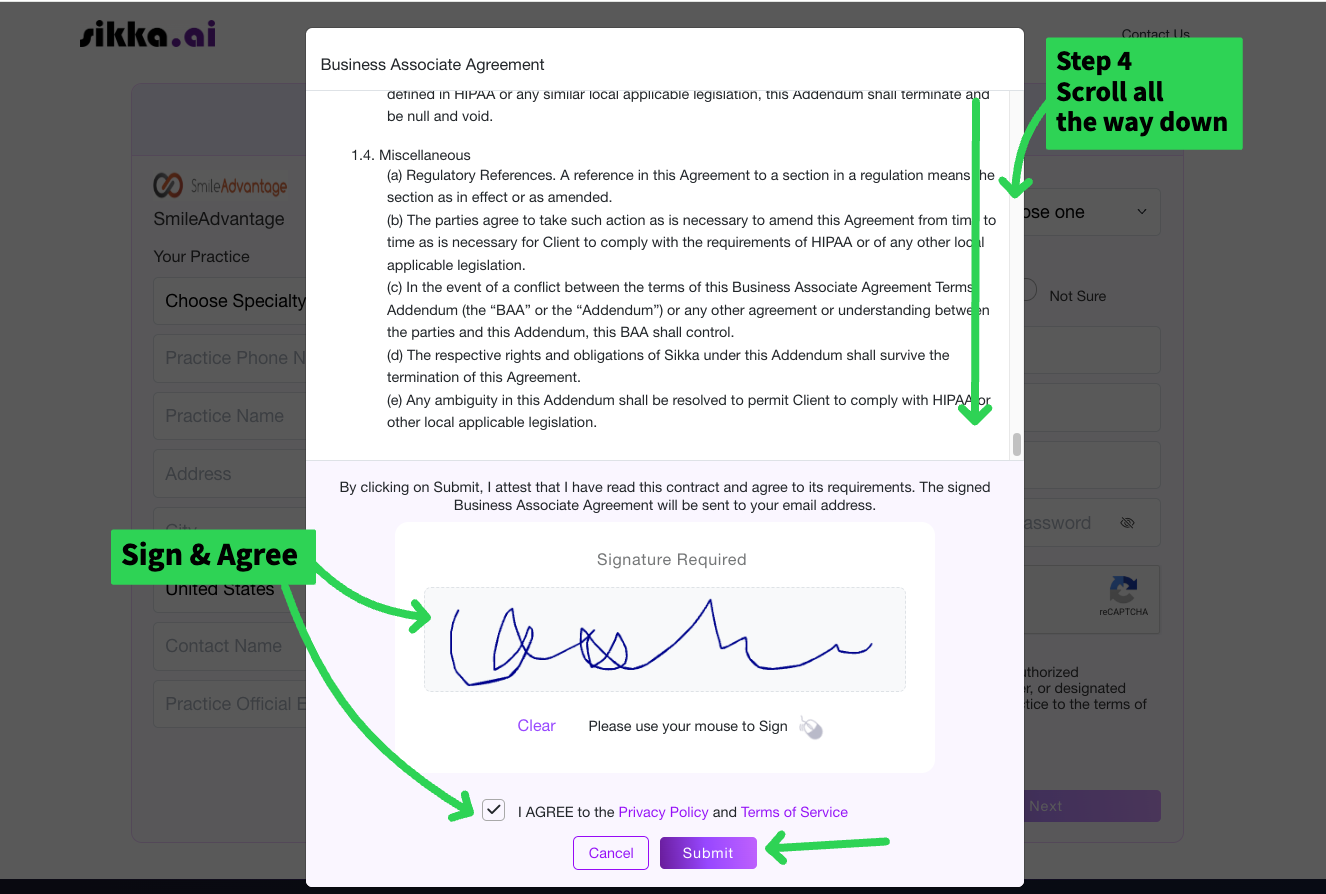
Section titled “Step 4: Read and sign the agreement”Scroll all the way to the bottom of the Business Associate Agreement to activate the signature box. Sign your name using your mouse or trackpad, check “I AGREE to the Privacy Policy and Terms of Service”, then click Submit.
A signed copy will be sent to your email automatically.
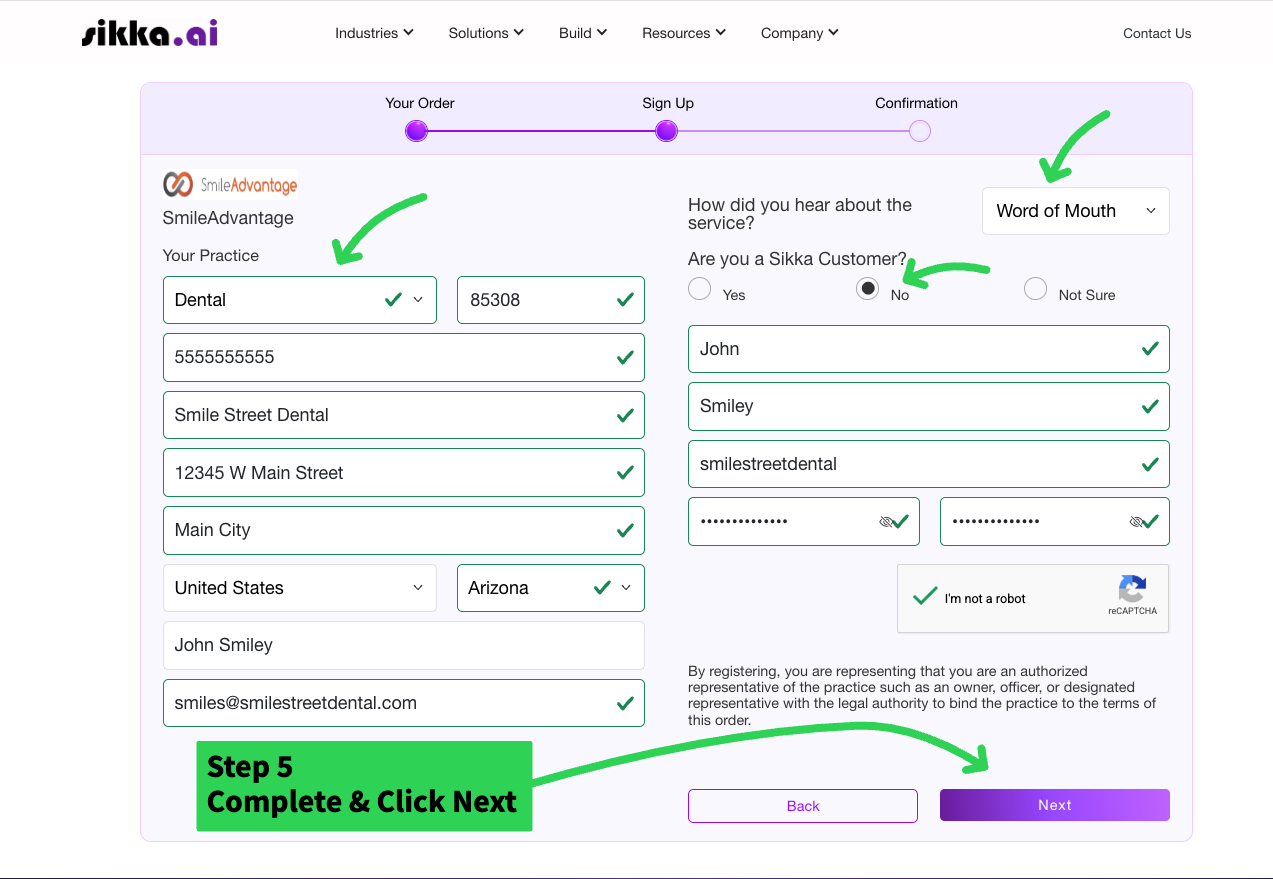
Step 5: Complete your practice details
Section titled “Step 5: Complete your practice details”Fill in every field on this screen:
- Specialty
- Phone number
- Practice name
- Address, city, and state
- Contact name
- Practice email
Create a username and password, then check “I’m not a robot”. Confirm that “Are you a Sikka Customer?” is still set to No, then click Next.
Step 6: Confirm your subscription
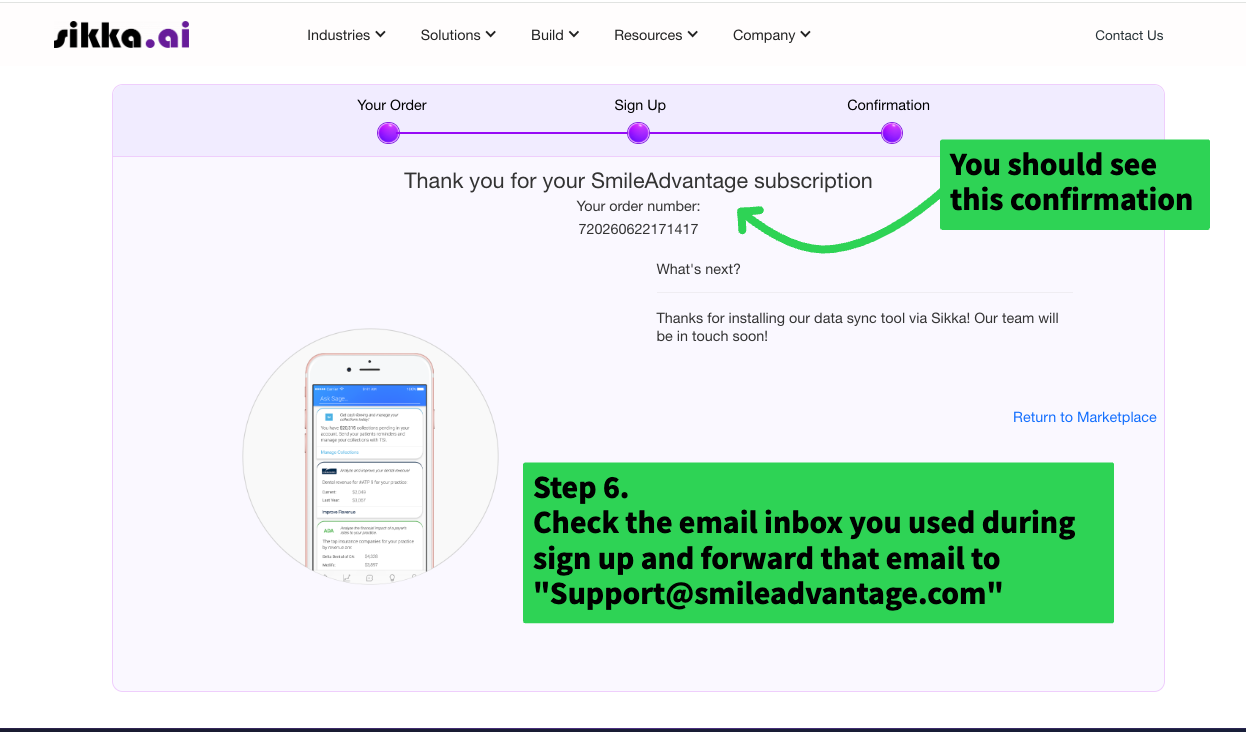
Section titled “Step 6: Confirm your subscription”You will see a “Thank you for your SmileAdvantage subscription” confirmation with an order number. That confirms your registration went through.
Now open the email inbox you used to register.
Step 7: Forward the welcome email
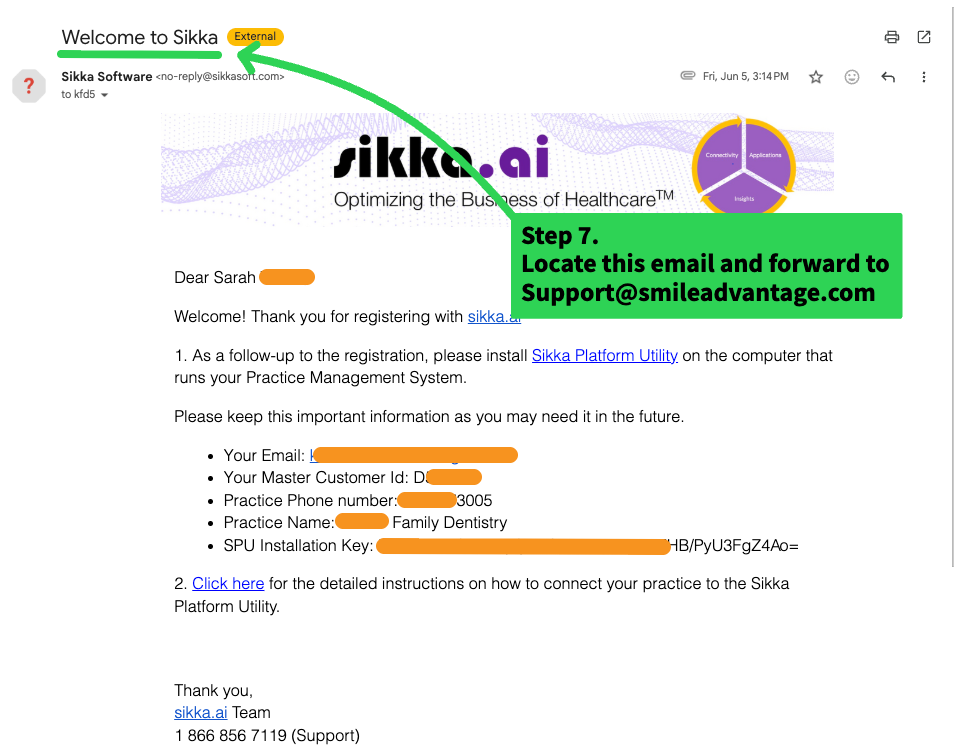
Section titled “Step 7: Forward the welcome email”In your inbox, find the email titled “Welcome to Sikka” from Sikka Software. Forward the entire email to:
That email contains the credentials our team needs to finish connecting your practice. Once we receive it, we handle the rest.
What happens next
Section titled “What happens next”Once our team receives the forwarded email, we finish the technical setup on our end. You do not need to do anything else. We will reach out to confirm when your practice is fully connected and your dashboard is syncing with your PMS.
For next steps after your PMS is connected, see:
- Adding or Syncing Patients from Your PMS
- PMS Setup Guide (tracking memberships inside your PMS)