PMS Integration
Guided SPU Install for IT Partners
Before we can activate a practice’s Smile Advantage connection, the Sikka Platform Utility (SPU) needs to be installed and configured on the server where the practice management system (PMS) runs. This guide walks your IT team through that setup: downloading the SPU, configuring its sync schedule and data path, and whitelisting it in the firewall. Complete everything below before your scheduled remote install session.
What is the SPU, and why does my team need to install it?
Section titled “What is the SPU, and why does my team need to install it?”
The Sikka Platform Utility (SPU) is a desktop application built by Sikka, our integration partner for PMS connectivity. It runs quietly on the practice server and keeps patient records, appointments, and payment data synced between the practice management system and the Smile Advantage dashboard. Your team installs and configures it once; after that, it runs in the background with no ongoing maintenance.
Before you begin
Section titled “Before you begin”Gather the following before you start:
- About 20-25 minutes
- Admin access to the practice server, to install software and configure the firewall
- The office’s Smile Advantage registration email and password - you will use this twice, once in the Sikka account portal and once in the SPU app itself
- The Installation key from that same registration email - entered on the first screen of the installer
- The PMS master username and password, provided by the office
Start here
Section titled “Start here”On the server computer, open the Sikka account portal:
Open the Sikka account portal
All five steps below start from this portal and the SPU app it installs.
Steps at a glance
Section titled “Steps at a glance”| Step | What you do |
|---|---|
| 1 | Log in to the Sikka account portal and download the SPU |
| 2 | Configure the sync scheduling and data points |
| 3 | Configure the PMS data path and credentials |
| 4 | Final check: refresh data and confirm the connection |
| 5 | Whitelist the SPU executables and URLs in the firewall |
Step 1: Log in and download the SPU
Section titled “Step 1: Log in and download the SPU”Log in to the account portal using the office’s registration email and password (the credentials they created when they registered with Smile Advantage). Click the Account Details tab, then click Download SPU. Once the file finishes downloading, run the installer.
On the installer’s first screen, enter the Installation key from the office’s registration email, then continue through setup.
Step 2: Configure scheduling
Section titled “Step 2: Configure scheduling”Once you are logged into the SPU app, click Settings in the left sidebar, then the Scheduling tab. Set Every to 30 and the unit to Minutes.
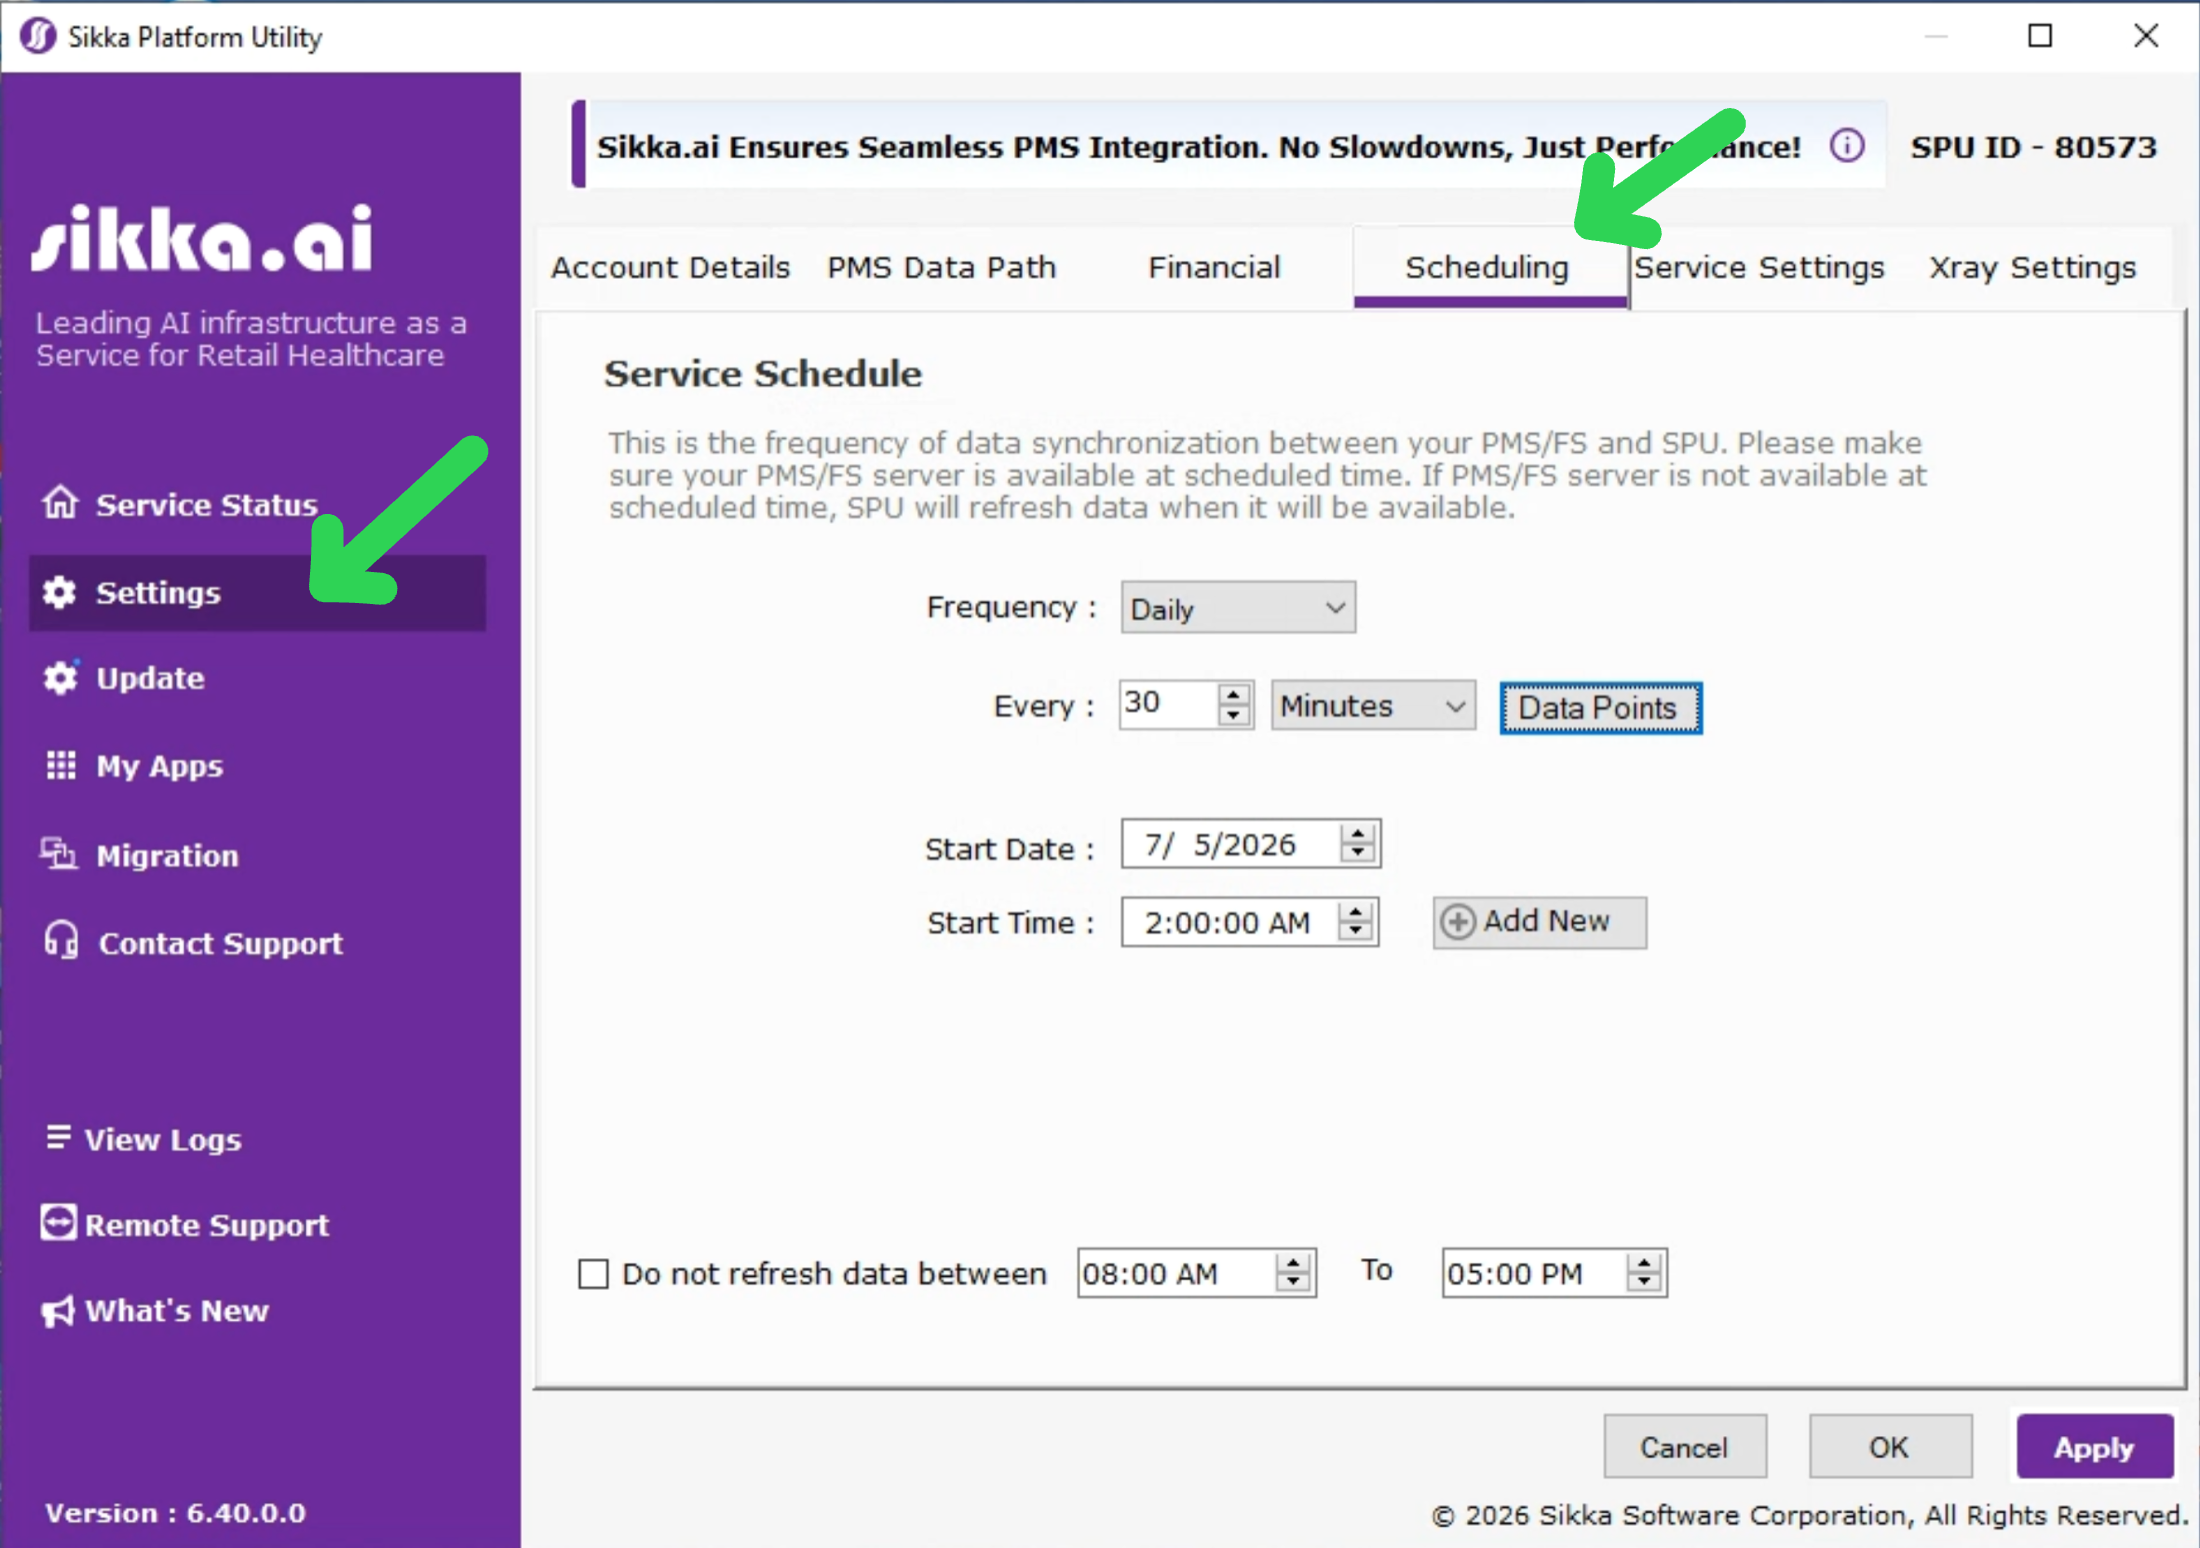
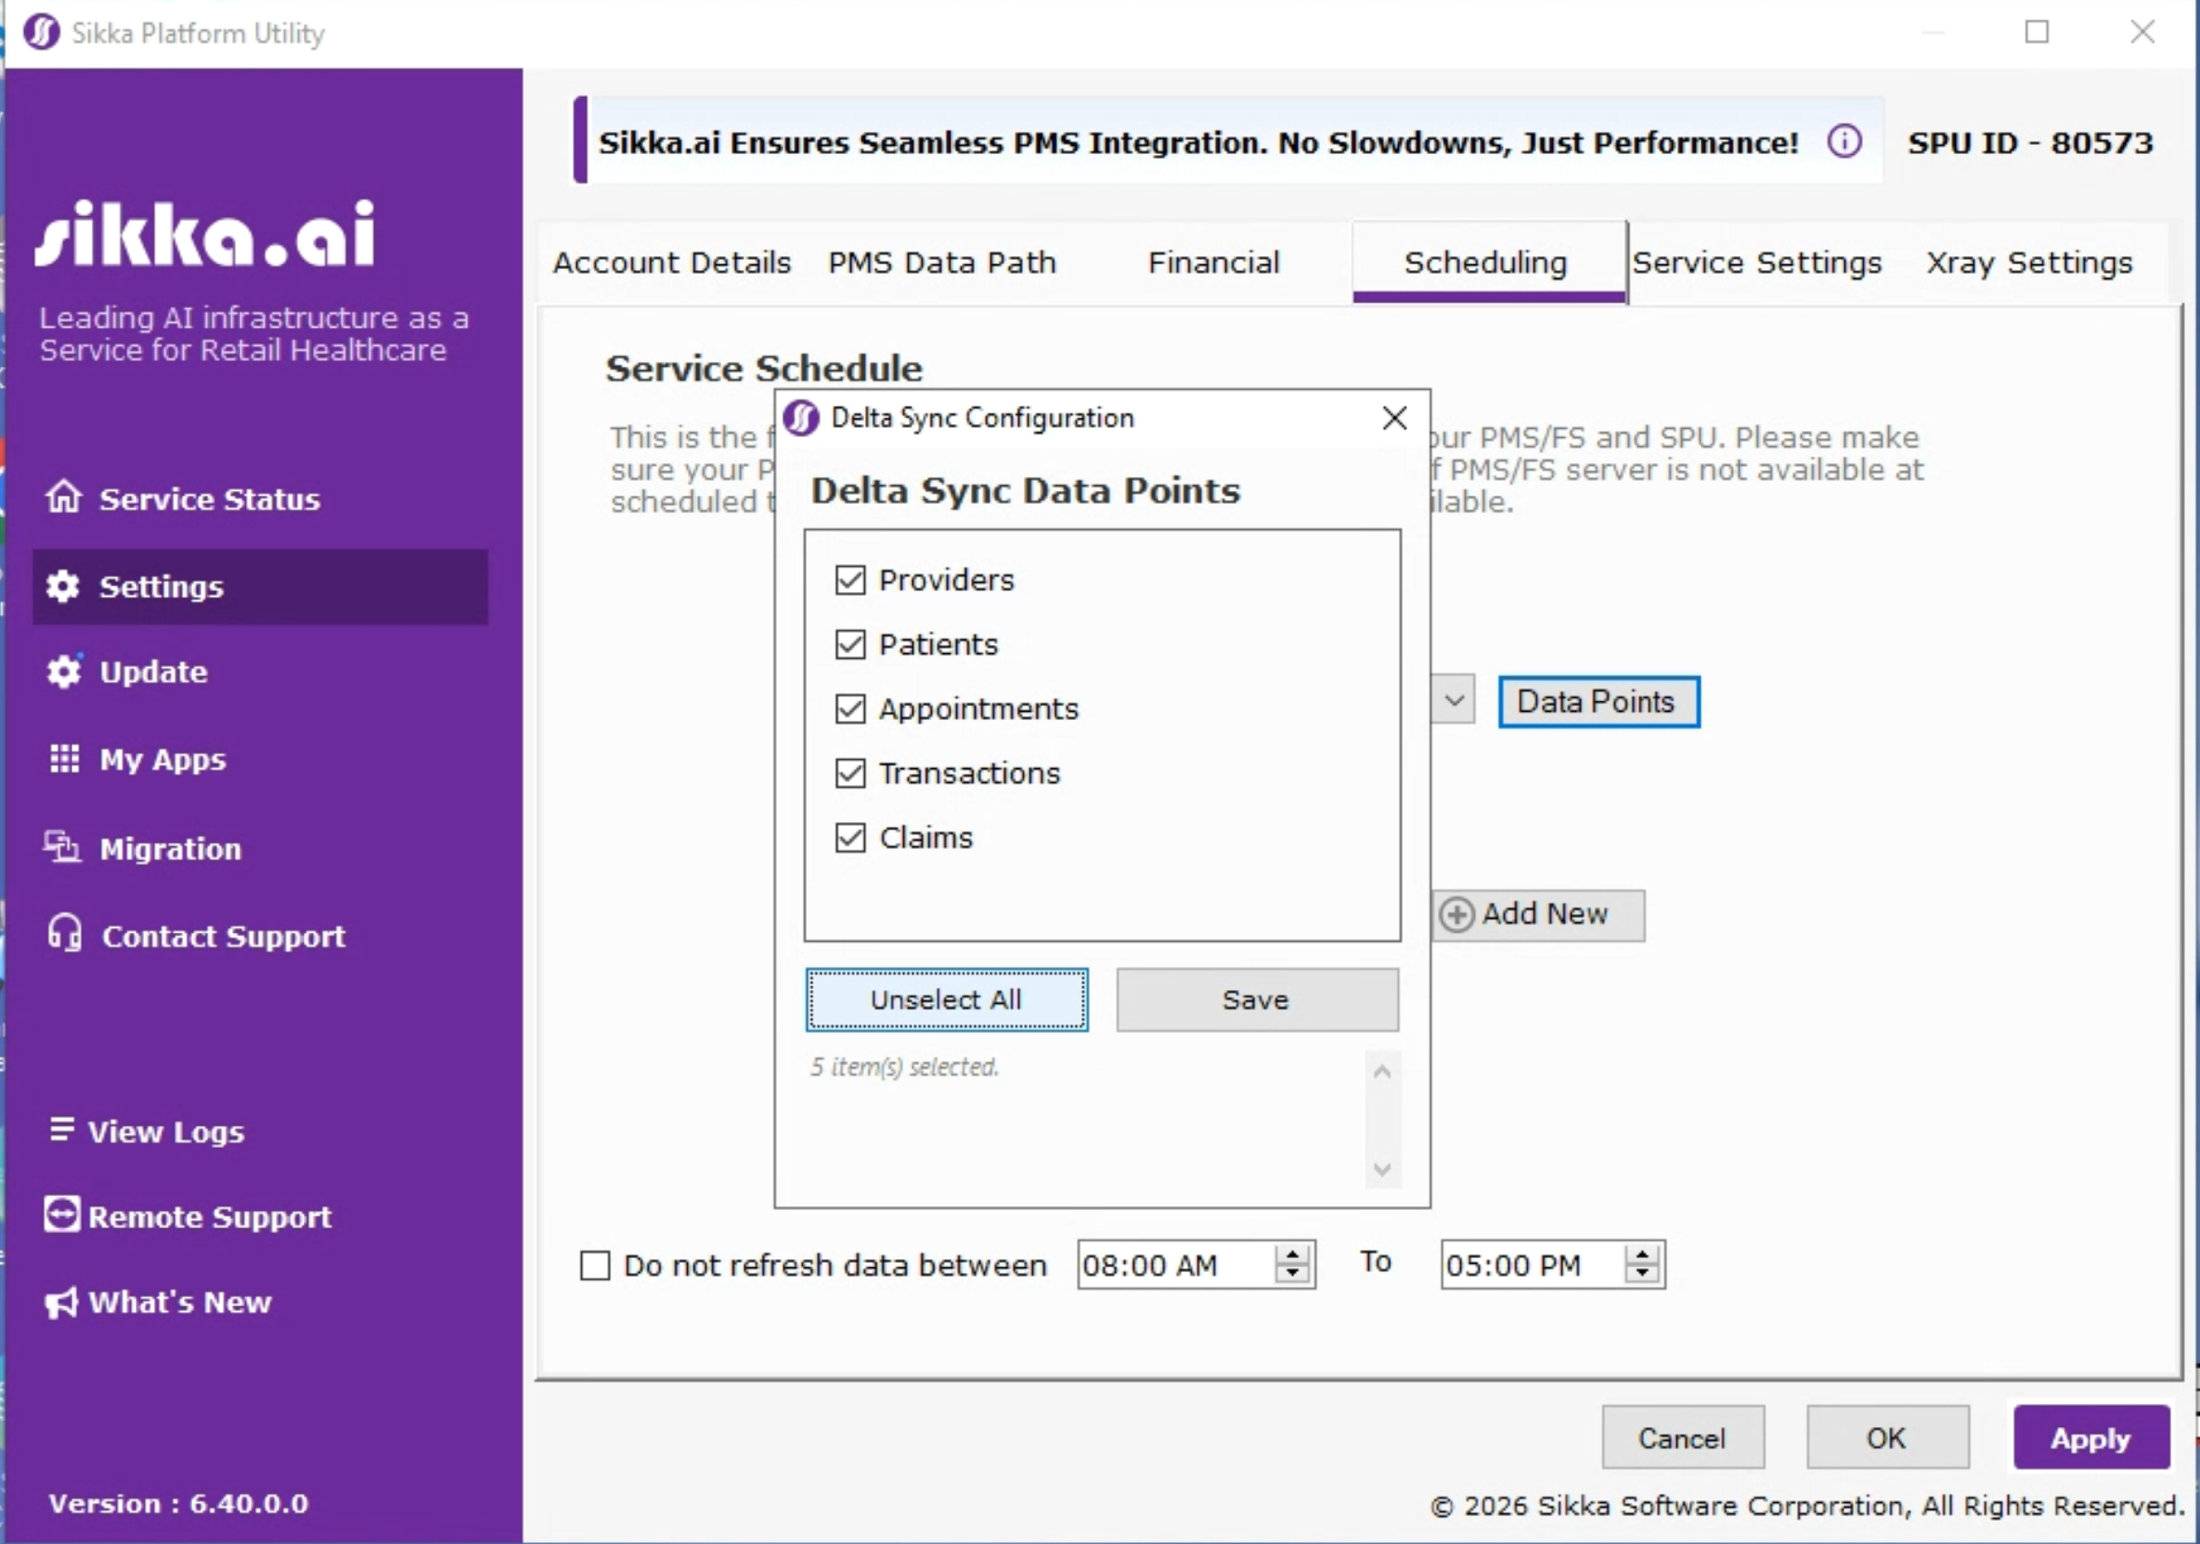
Click the Data Points button. In the window that opens, click Select All, then Save.
Step 3: Configure data path
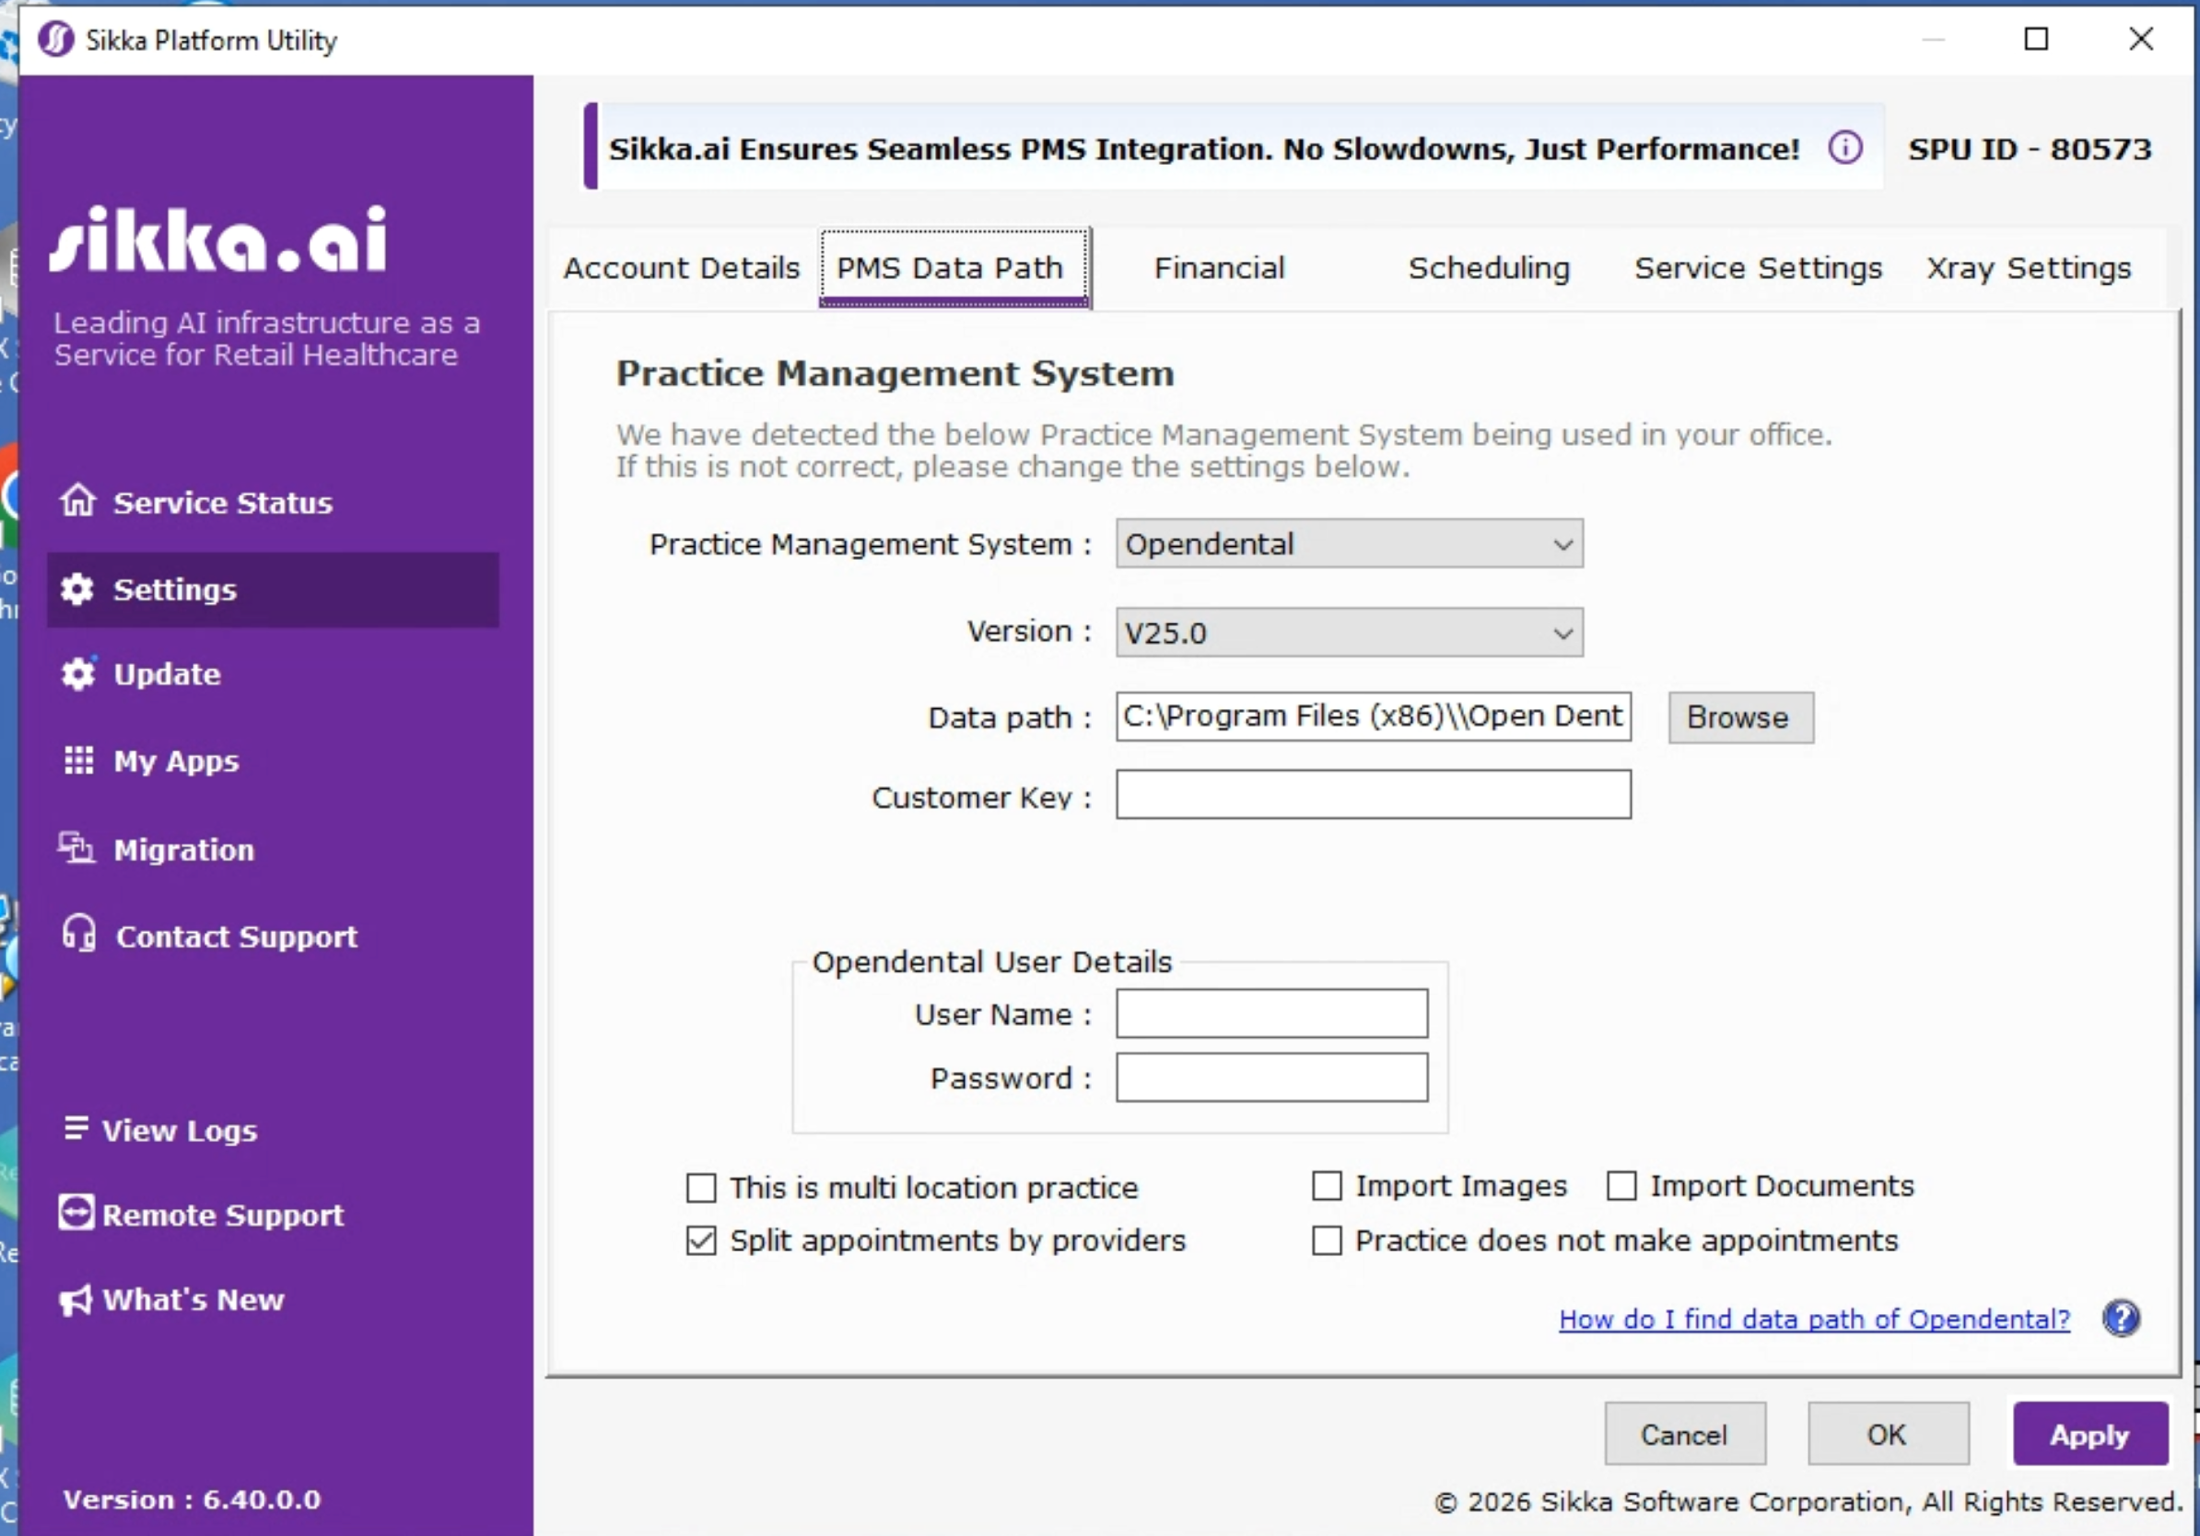
Section titled “Step 3: Configure data path”Click the PMS Data Path tab. Confirm the detected practice management system and data path look correct - the SPU usually auto-detects this. Enter the PMS master username and password, provided by the office, in the user details fields, then click Apply.
Step 4: Final check
Section titled “Step 4: Final check”Open Service Status in the left sidebar and click Refresh Data to confirm the SPU can reach the PMS.
Step 5: Update the firewall
Section titled “Step 5: Update the firewall”Finish by whitelisting the SPU through the firewall so it can sync with Smile Advantage. Allow these two executables:
C:\Users\<windows username>\AppData\Local\SSCService\SSCService.exeC:\Users\<windows username>\AppData\Local\SSCService\SSCWindowsService.exe
Then whitelist these URLs and ports:
| URL | Port(s) |
|---|---|
https://webservices.sikkasoft.com | 80 and 443 |
https://centraldata.s3.amazonaws.com/ | 443 only |
https://spuupdates.s3.amazonaws.com/ | 443 only |
What happens next
Section titled “What happens next”That is everything on your end before the install session. From here:
- Confirm your remote support session is scheduled and ready to go.
- During the session, our team activates the Smile Advantage connection and configures the payment type. You should not need to do anything further on the SPU side.
For the practice-side steps that happen before this install, see: