Getting Started
Add a New Member (Smile Advantage PRO)
Your Smile Advantage dashboard lets you add new members quickly and accurately. The steps look slightly different depending on whether your office uses Smile Advantage CORE or PRO. This guide covers Smile Advantage PRO. If your office is on CORE, use the CORE instructions instead.
Smile Advantage PRO is connected directly with your Practice Management Software (PMS), so patient information syncs instantly. This makes adding memberships faster, more accurate, and easier for your front office team.

Steps to Add a New Member
Section titled “Steps to Add a New Member”-
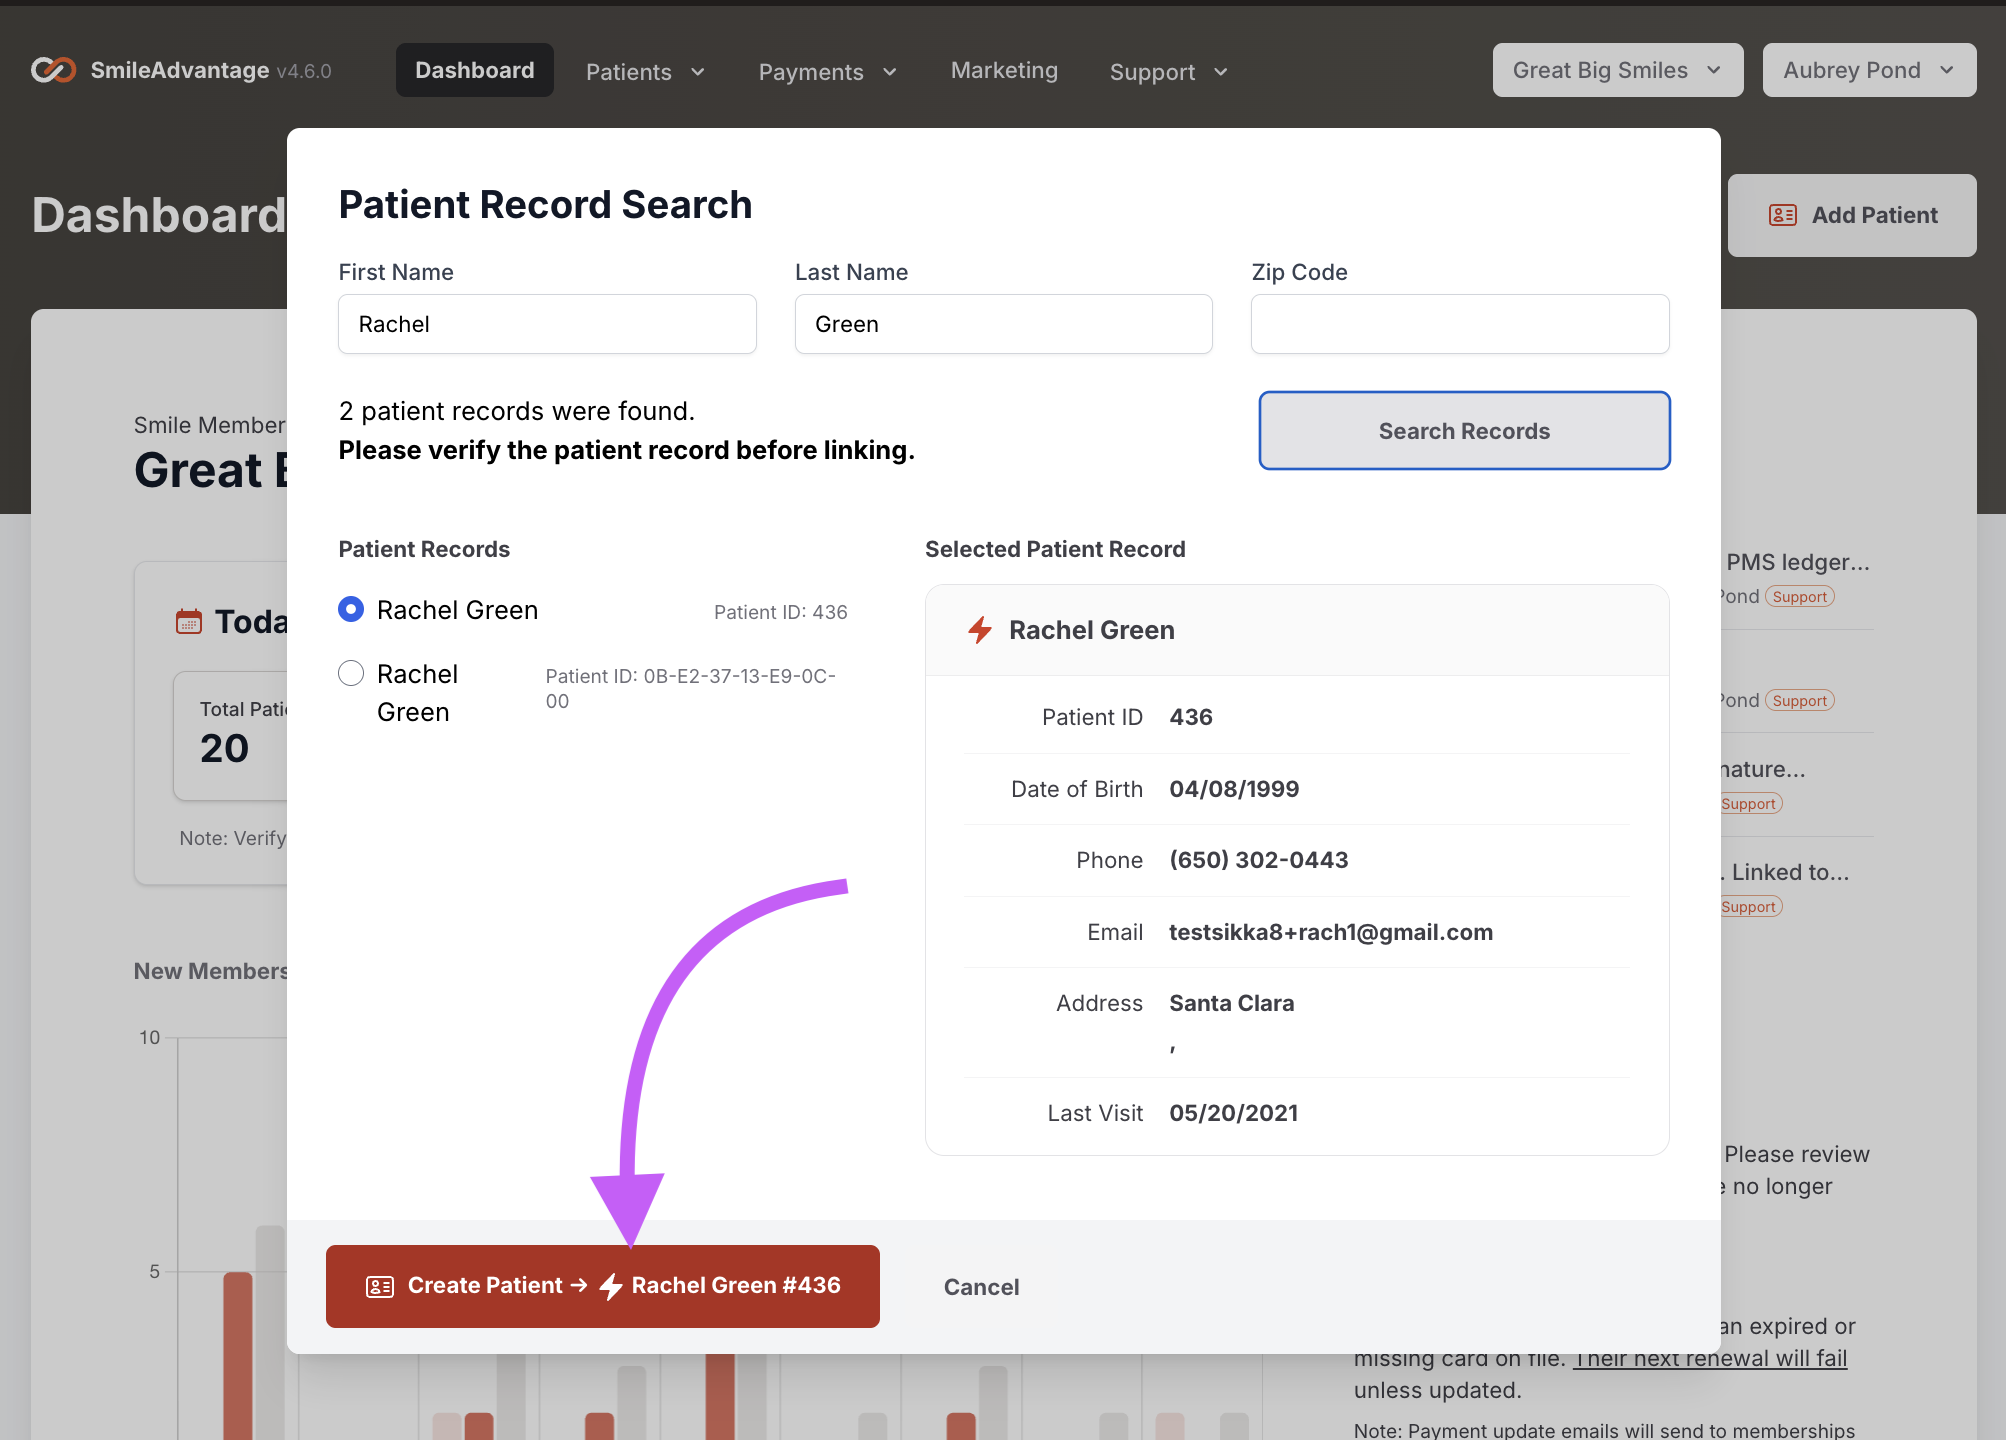
Add or search for the patient. Click Add Patient in the upper right corner of your dashboard. Search using the patient’s first name, last name, and zip code, then select the correct patient from the list. If the patient does not exist in your PMS, you can manually create them.
-
Link the patient. Once selected, you will see their PMS information (name, birthday, phone, email, address). Review it for accuracy and click Create Member to link the record. If required information is missing, you will be prompted to update the patient profile before continuing.
-
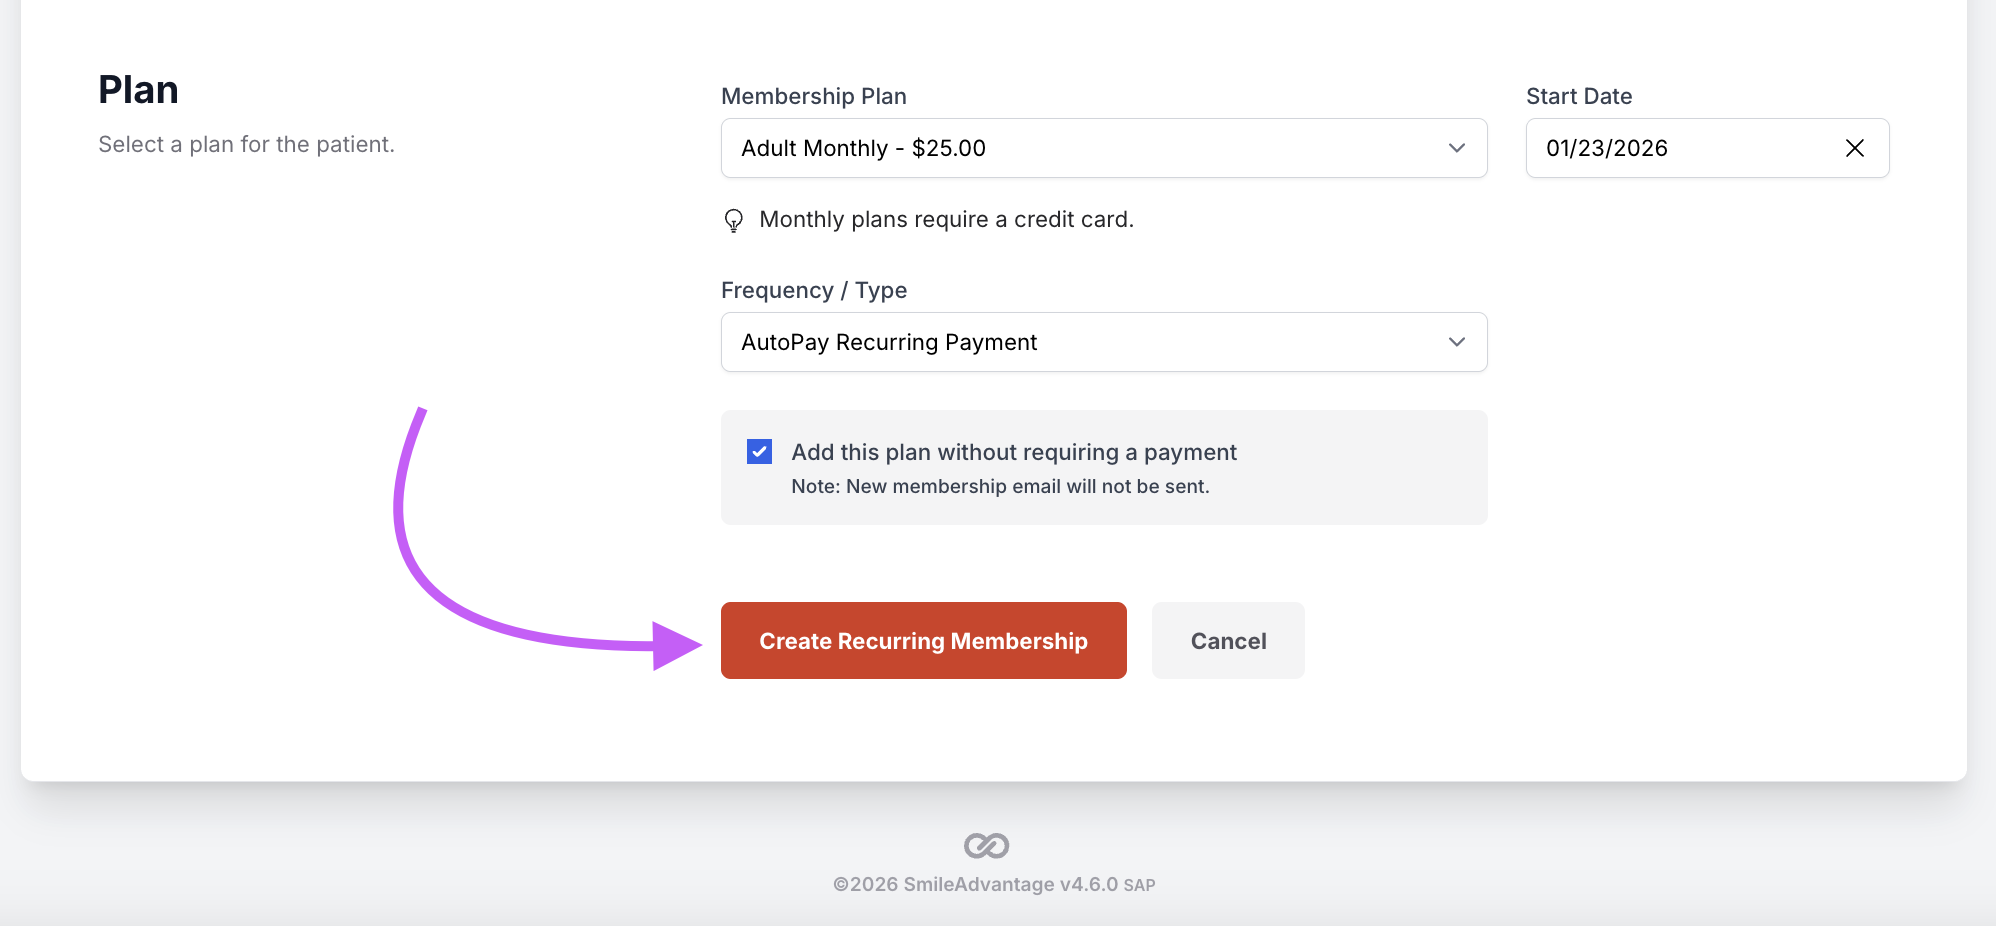
Add a new membership. From the patient’s profile, click Add New Membership. This opens the membership enrollment screen.

-
Choose the membership plan. Select the appropriate plan from your office’s available options:
- Annual plans
- Monthly plans
- Family or multi-member plans
- Custom or orthodontic plans
Then choose the start date.

-
Select the payment type. You can choose between:
- AutoPay Recurring (credit card only). Auto-renews each cycle. Best for monthly memberships.
- One-time payment, credit card. Pre-pays for one year and does not renew automatically. The patient receives renewal reminders and can renew online using the secure payment link.
- One-time payment, cash or check. Pre-pays for one year. The patient also receives renewal reminders. If they prefer to renew with cash or check again, the payment is taken in office.
-
Add optional fees. You may add enrollment fees, discounts, or custom adjustments. A notes field is available to explain the purpose of the fee.
-
Enter payment information. If taking a credit card payment, enter the card information. Confirm that the patient has reviewed and signed the Terms & Conditions. If your office uses ledger posting, you can choose whether to automatically post the transaction back to your PMS.
-
Create the membership. Click Create Membership. A confirmation message appears, and the membership now displays in the Membership section of the patient’s profile. Your member is now active.