Payment Management
Transaction Adjustments
What is a transaction adjustment?
Section titled “What is a transaction adjustment?”A transaction adjustment allows your office to document a payment or correction that happened outside the Smile Advantage dashboard.
Adjustments are useful when:
- A patient pays in-office by card (outside the dashboard)
- A patient brings cash or a check
- A third-party payment is collected
- A correction is needed for an overpayment or underpayment
- You simply need the membership ledger to reflect what actually happened in office
Adjustments help keep the patient’s membership history accurate and complete.
How to add an adjustment
Section titled “How to add an adjustment”-
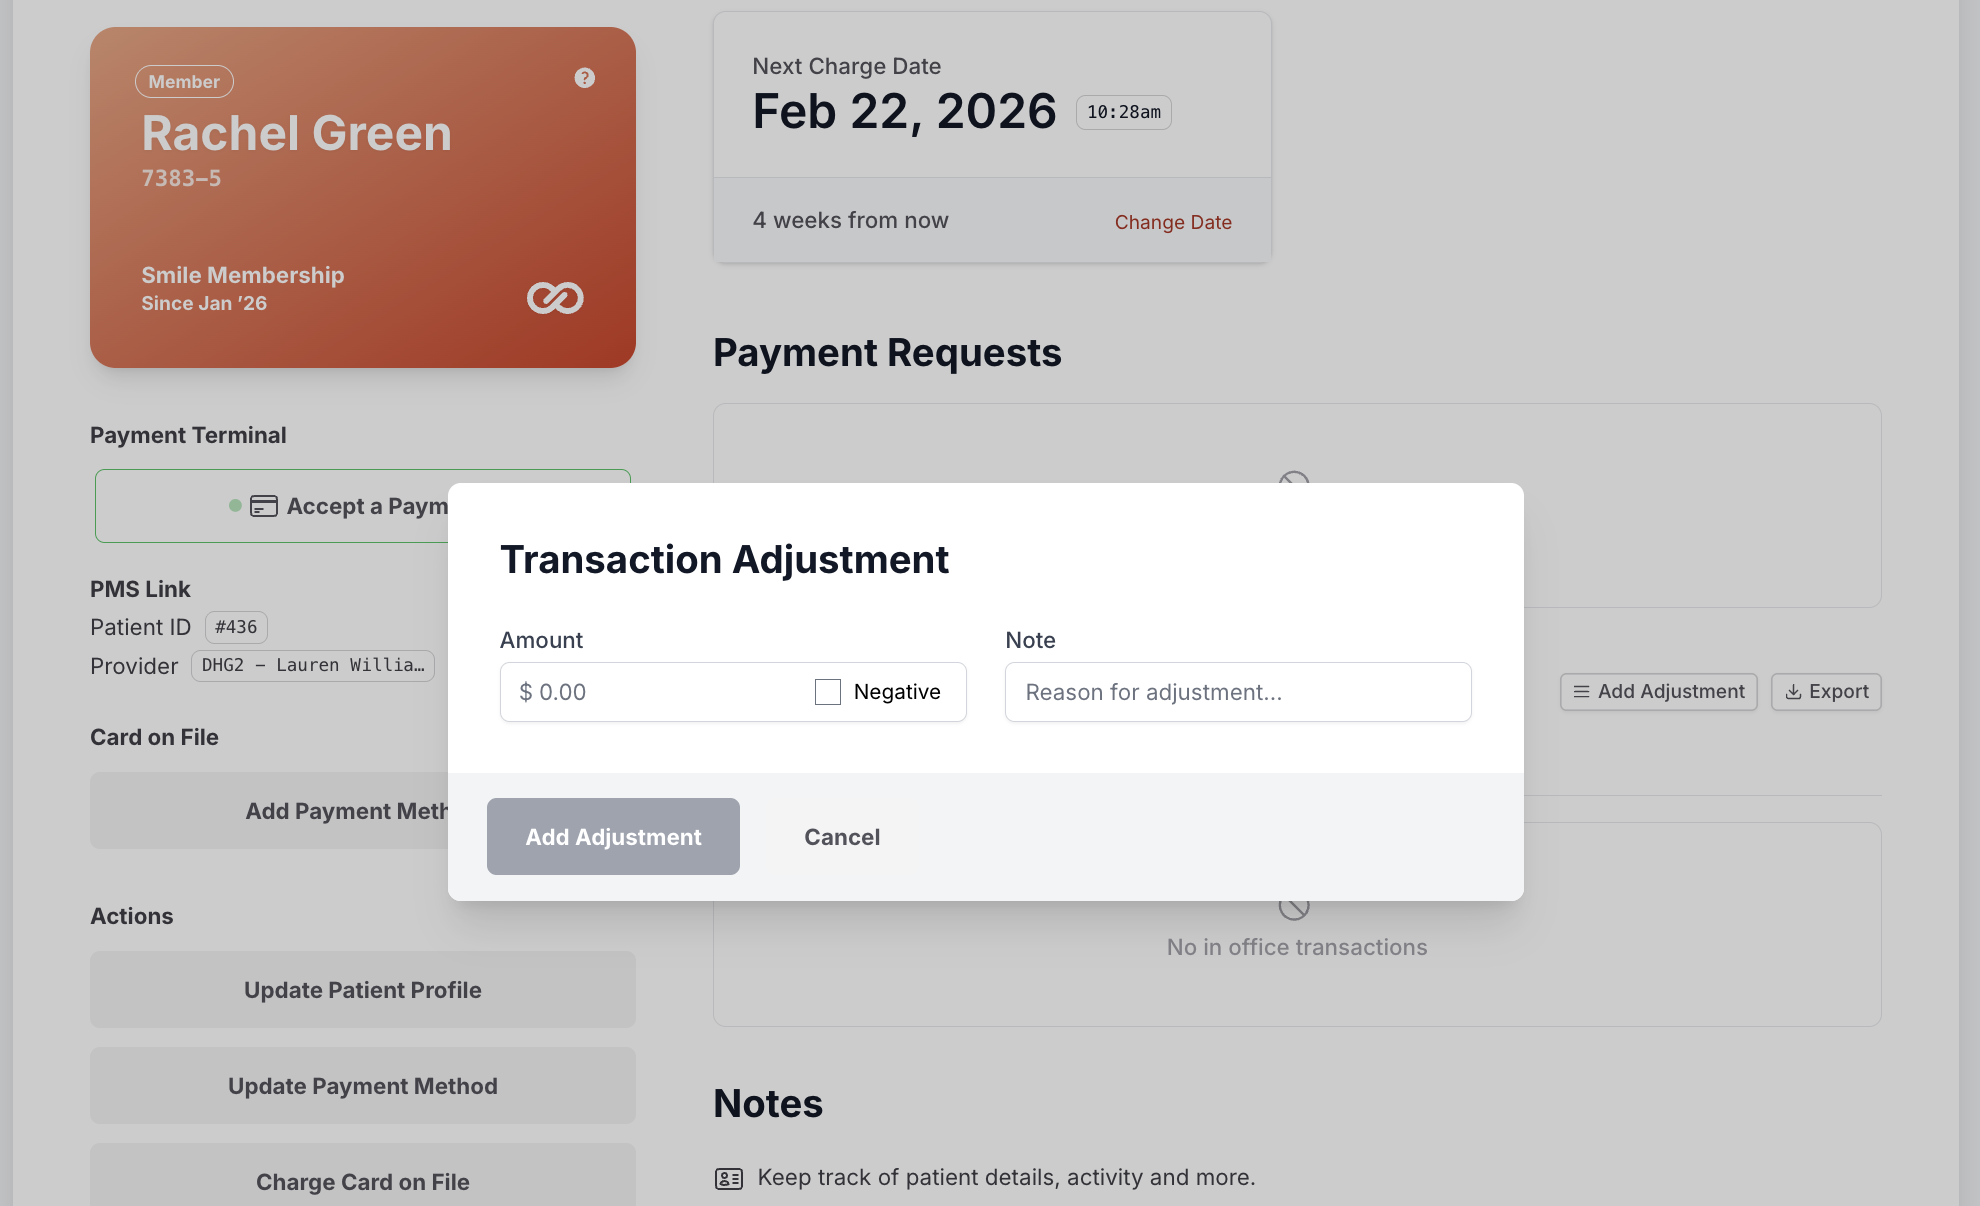
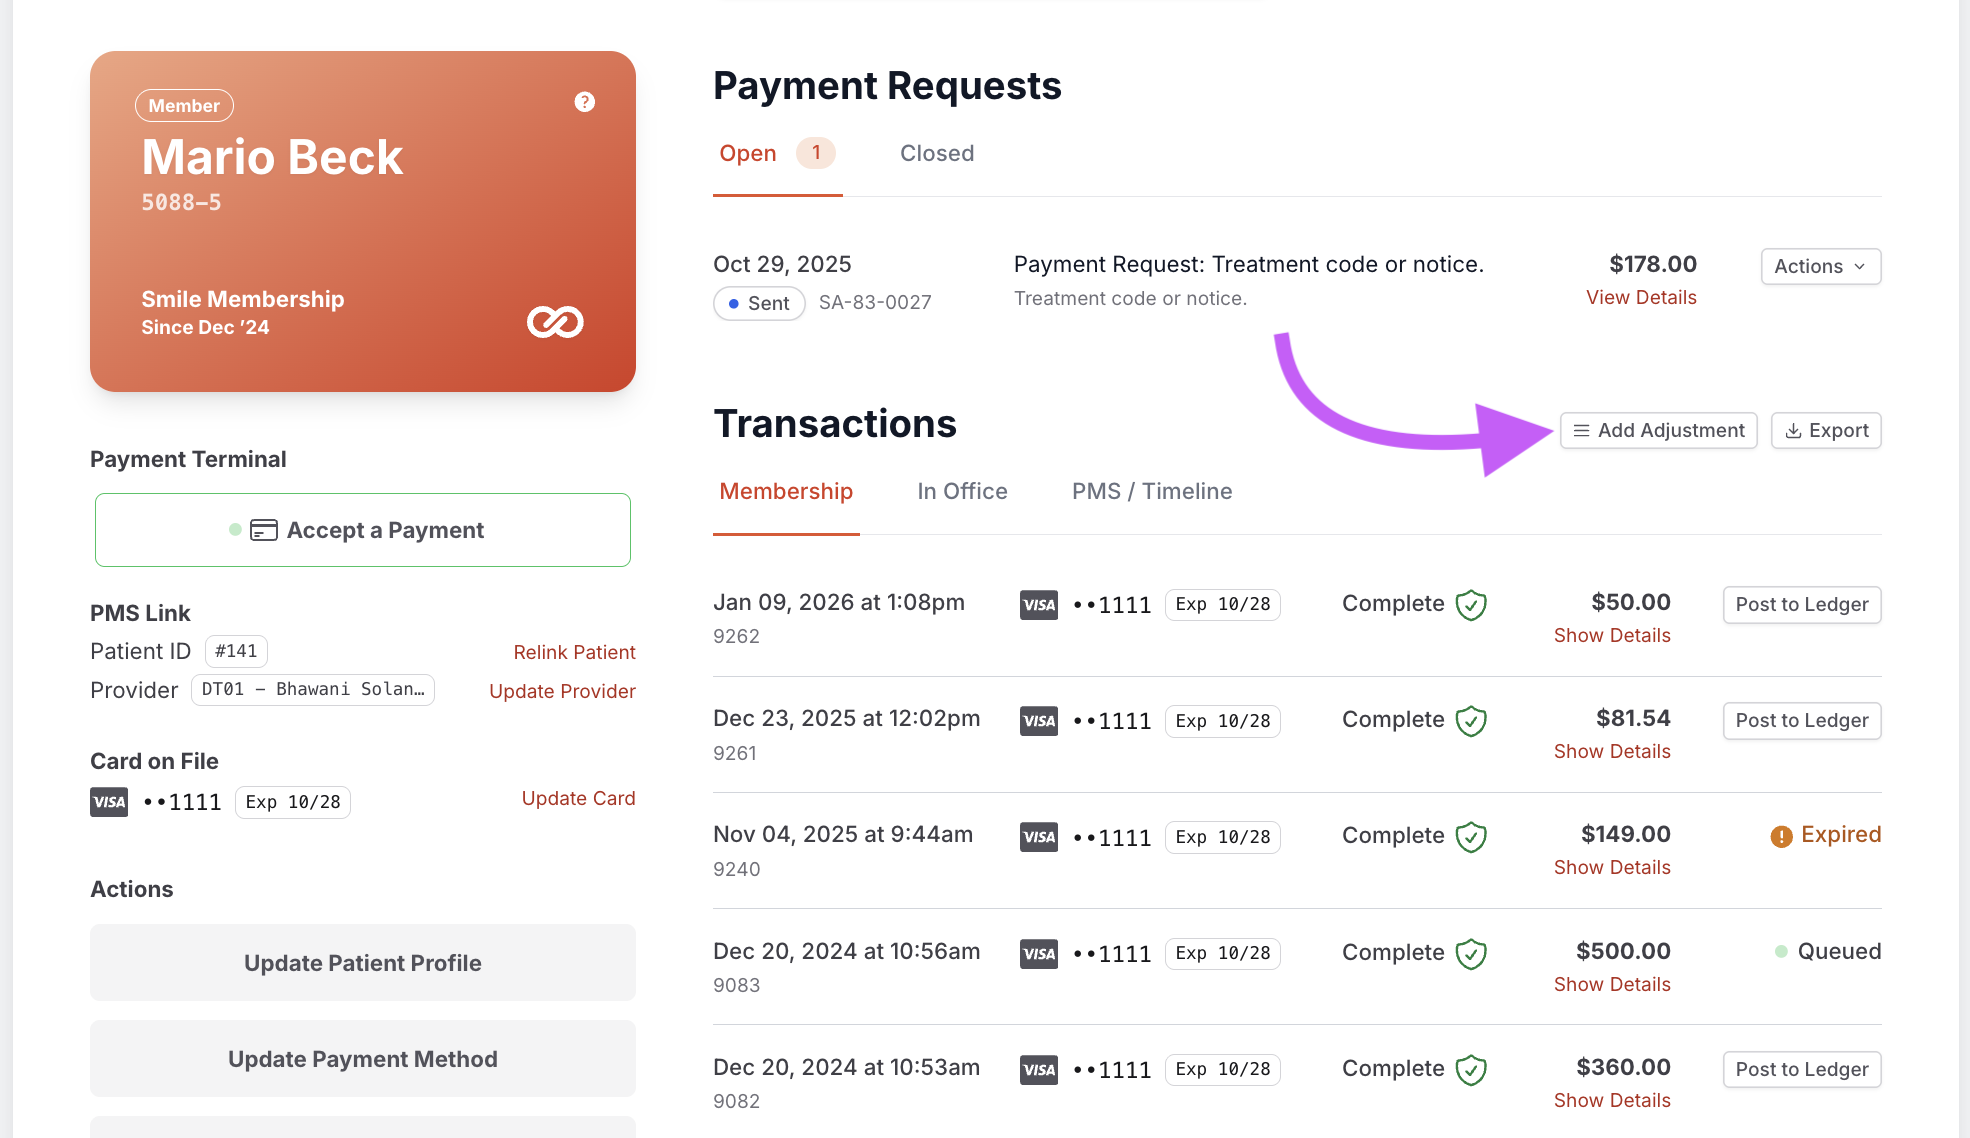
Open the member’s profile. Scroll to the Transactions section and click Add Adjustment.
-
Enter the adjustment details. In the Adjustment window:
- Enter the Amount
- Check Negative if you are subtracting from the balance
- Add a Note explaining the reason, for example: “Patient paid with check in office”, “Correcting duplicate charge from terminal”, or “Refund issued in office, documenting adjustment”

-
Save the adjustment. Click Add Adjustment. The adjustment will now appear in the patient’s transaction list, along with the note you added.
Posting adjustments to your PMS
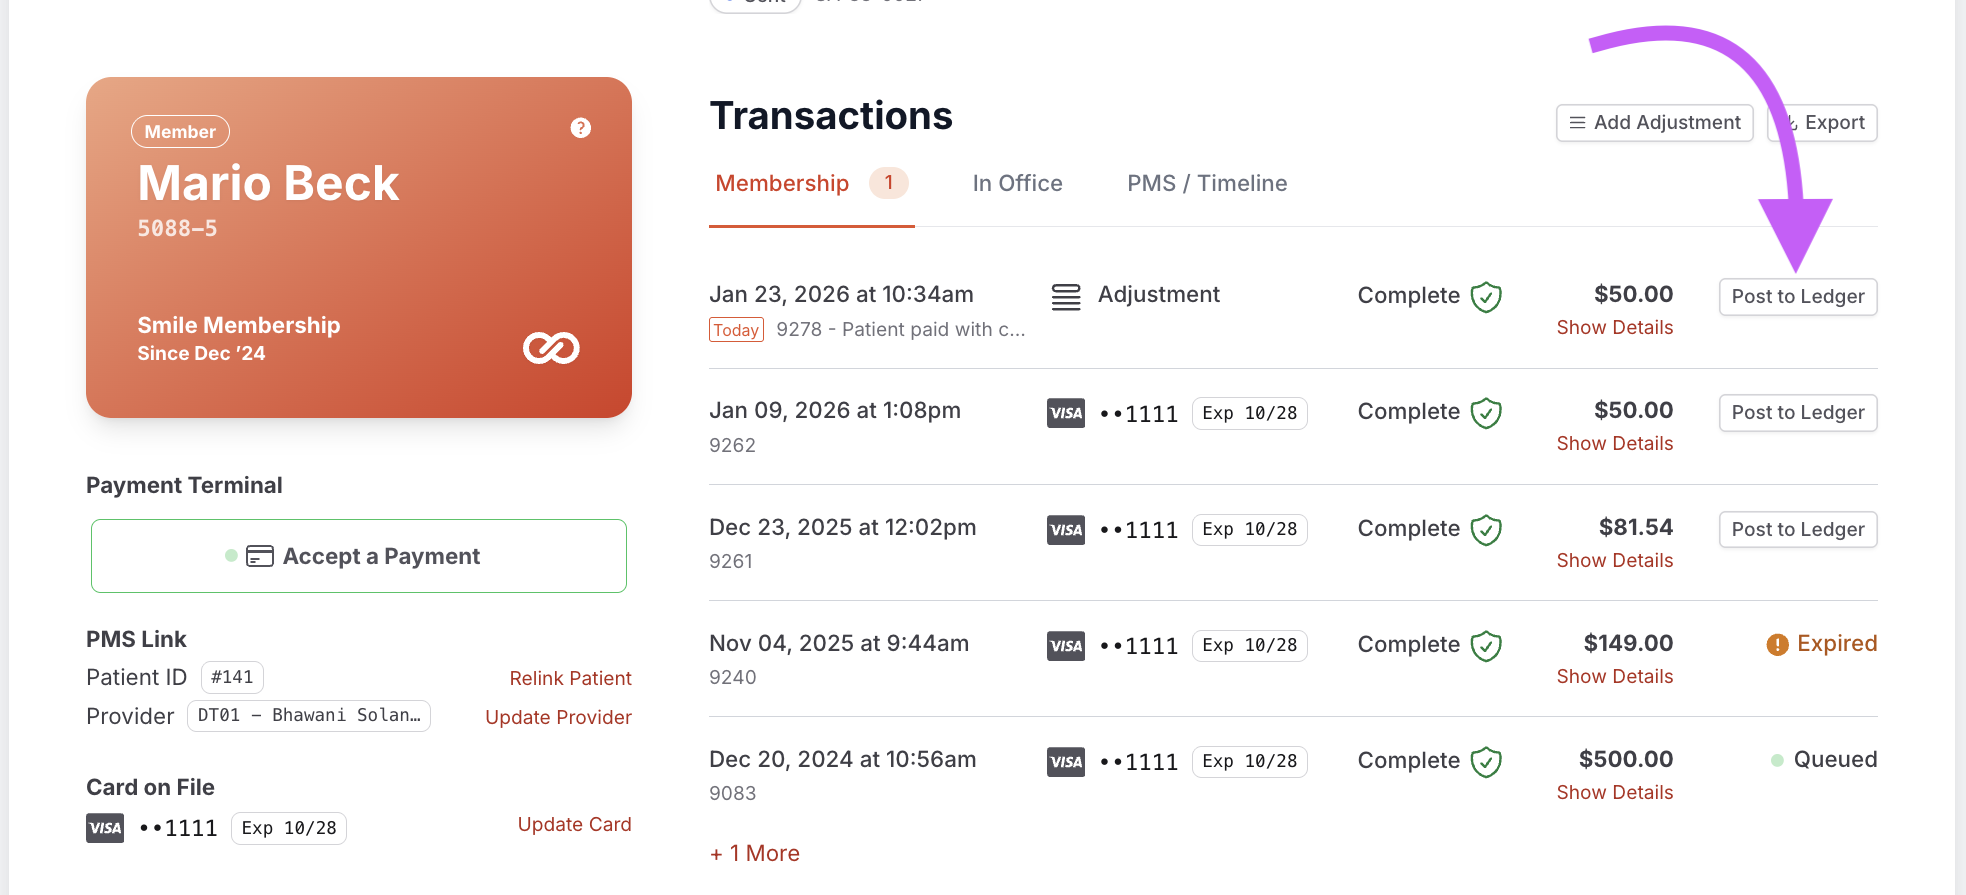
Section titled “Posting adjustments to your PMS”If your office uses PMS posting, you will see a Post to Ledger button next to the adjustment.
- Clicking this sends the adjustment to your PMS
- You will see a “Queued” message until it is confirmed
- Once processed, it will update to “Complete”
When to use adjustments
Section titled “When to use adjustments”Adjustments are designed for documenting payments or corrections, including:
- Cash, check, or in-office credit card payments
- Third-party financing
- Account balancing
- Recording a refund that was already issued in-office
They keep the membership financial history organized and accurate without changing the actual billing method.